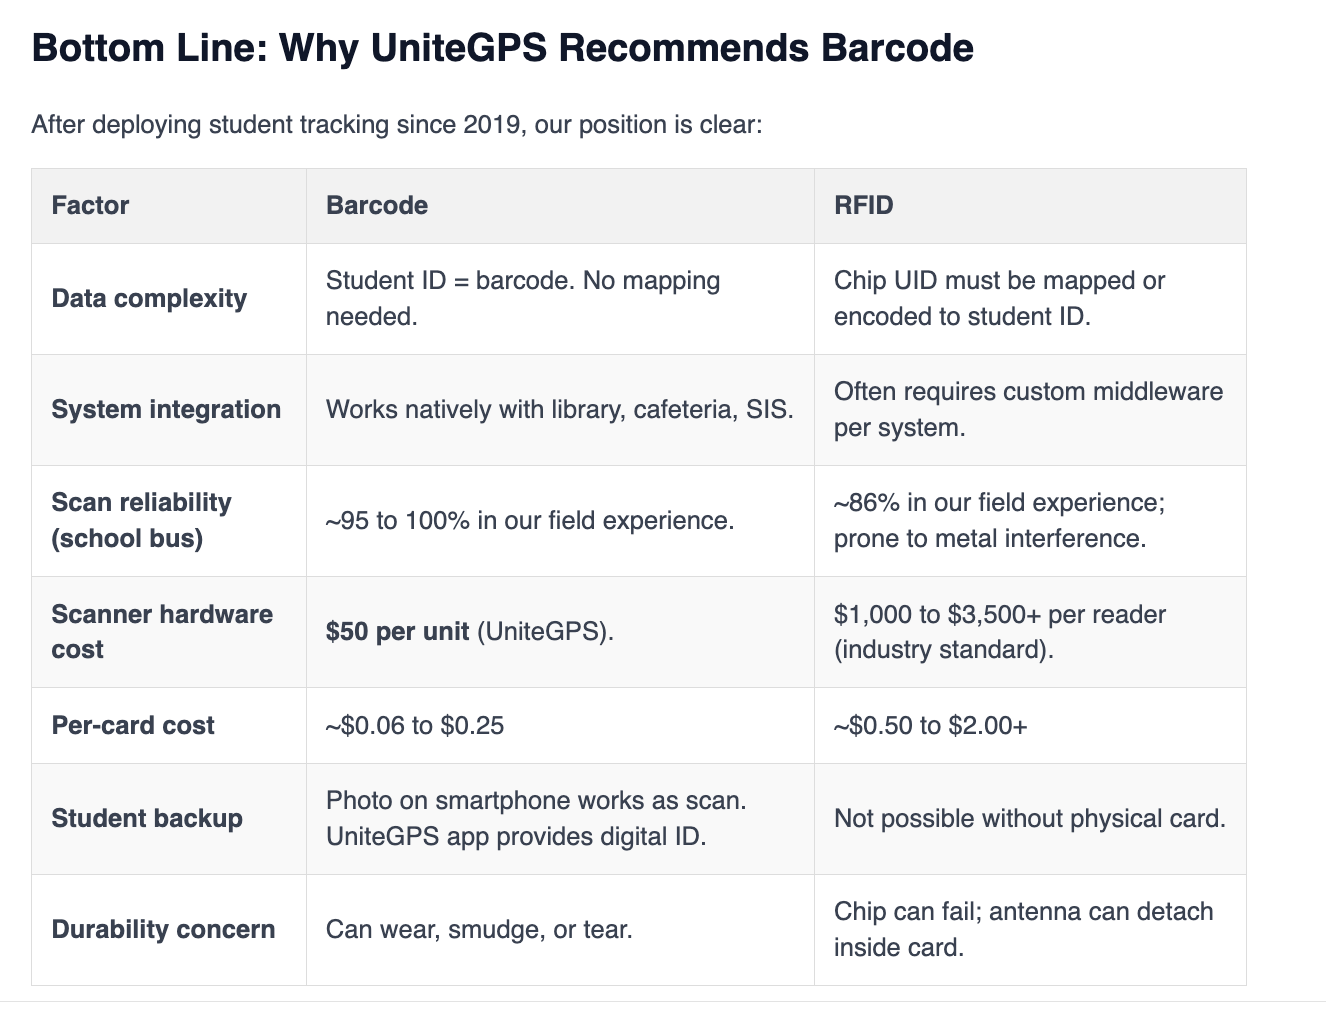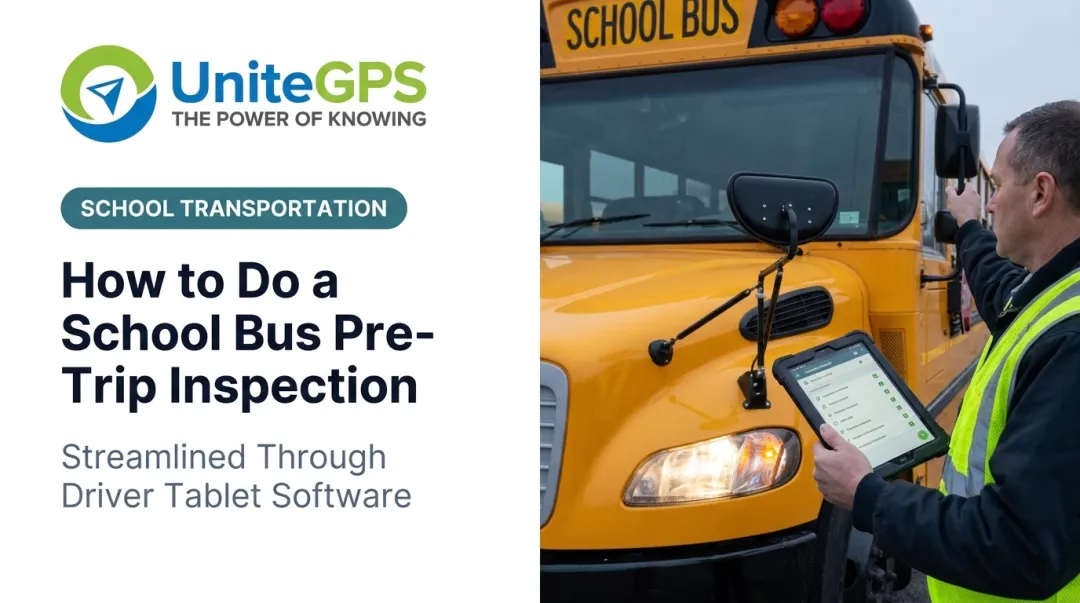
Before a single student climbs the steps, a driver has already made dozens of safety decisions. The pre-trip inspection is where that happens — a quiet 15 minutes in an empty parking lot that determines whether the rest of the route goes smoothly.
Every district follows some version of the same federal framework, but execution varies a lot. A rushed driver with no checklist catches different problems than one with a tread depth gauge, a flashlight, and yesterday's inspection report in hand. Some districts still rely on paper DVIRs that get lost in a glove box. Others have moved to tablets that flag defects the moment they're found.
This guide walks through the full walkaround sequence, what's actually required under federal rule, the inspection points most likely to trigger a failure, and what to do the moment you find something wrong.
Key Takeaways
- Federal rule 49 CFR 396.13 requires drivers to verify vehicle safety and review yesterday's inspection report.
- A thorough walkaround takes 15-20 minutes, covering engine, cab, exterior, bus-specific features, and interior.
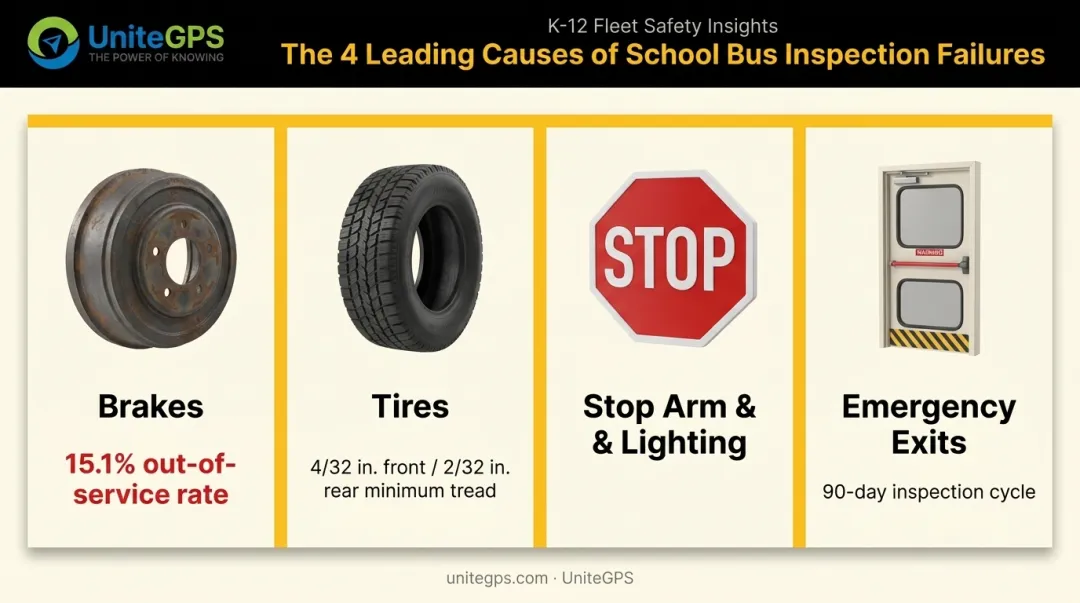
- Brakes, tires, stop arms, and emergency exits cause most out-of-service violations.
- Finding a defect means the process worked; documentation and escalation are what protect students.
- Pairing daily inspections with real-time defect reporting and parent communication tools reduces breakdowns and confused calls.
How to Do a School Bus Pre-Trip Inspection: Step-by-Step
Most drivers work a clockwise walkaround starting at the driver's door and ending back where they started. DOT inspectors care less about which direction you move and more about whether you actually cover every zone, every time. A skipped section is a skipped section whether the bus passed or not.
Here's the sequence, broken into five stages.
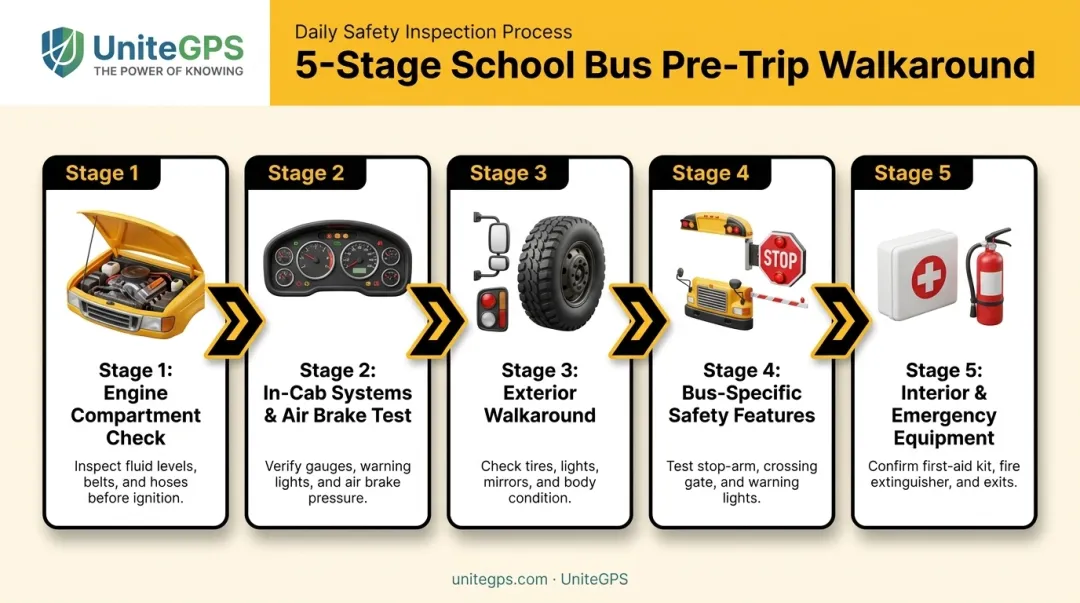
Step 1: Engine Compartment & Under-the-Hood Check
Pop the hood before you start the engine. Check:
- Oil level and condition
- Coolant level
- Power steering fluid
- Windshield washer fluid
- Belts and hoses for cracking, fraying, or looseness
- Battery terminals for corrosion
Before closing the hood, look under the engine block and check the ground beneath the bus. No puddles, no drips, no exceptions. A small coolant leak today is a stranded bus on a route tomorrow.
Step 2: In-Cab Systems & Air Brake Test
Start the engine and let air pressure build to governor cutoff. FMCSA's guidance materials put this typically in the 110-130 psi range, though the exact cutoff depends on the manufacturer's spec, not a fixed number in federal code. From there:
- Run the leak-down test. With the engine off and brakes released, pressure shouldn't drop more than a few psi per minute.
- Check the low-air warning. On buses built to FMVSS 121, the warning must activate before reservoir pressure drops below 60 psi. Older vehicles must warn at 55 psi or half of governor cutoff, whichever is lower.
- Test the spring brake pop-out. This typically triggers somewhere in the 20-45 psi range, per manufacturer specification — confirm the number for your specific bus model.
| Check | Typical range | Source |
|---|---|---|
| Governor cutoff | 110-130 psi | Manufacturer spec / FMCSA guidance |
| Low-air warning (FMVSS 121 buses) | Below 60 psi | Federal design requirement |
| Low-air warning (older buses) | 55 psi or half cutoff | Federal design requirement |
| Spring brake pop-out | 20-45 psi | Manufacturer spec |
While you're in the cab, test the horn, wipers, defroster, heater, and every dashboard warning light. A dead defroster doesn't sound urgent until it's 22°F and you can't see the crosswalk.
Step 3: Exterior Walkaround (Tires, Lights, Body)
Circle the bus checking:
- Tire tread depth and sidewall condition on every wheel
- Wheel lug nuts for looseness or rust streaking (a sign they've backed off)
- Mirrors for cracks or misalignment
- Body panels for damage
- Every exterior light — headlights, brake lights, turn signals, marker lights, both sides and rear
Again, check the ground. Fluid puddles, sidewall bulges, or exposed cords under a tire mean the bus doesn't move until that's fixed.
Step 4: School Bus-Specific Safety Features
This is the step that separates a school bus inspection from a standard CMV inspection. Test:
- The stop arm — full deployment, full retraction, and lamp function
- The crossing control arm, if equipped
- Amber and red student loading lights, confirming they cycle correctly
- The rear emergency exit and any push-out windows, opening freely from both inside and outside
- Emergency door alarms, where applicable
A stop arm that deploys a half-second late is invisible to a driver approaching at 45 mph. That timing is the entire point of the vehicle.
Step 5: Interior & Emergency Equipment Check
Before students board, confirm:
- Fire extinguisher is charged, mounted, and accessible
- First aid kit and body fluid cleanup kit are present and sealed
- Seats are securely fastened with no loose bolts
- The student mirror gives a full, unobstructed view of the cabin
This is also the moment to pull up yesterday's DVIR and confirm any noted defects were certified as repaired before you sign off and head out. Skipping this review is one of the most common, and most avoidable, mistakes drivers make.
What You Need Before Starting the Inspection
Rushing the setup is the most common reason inspections miss things. If a driver arrives with three minutes to spare, something in the sequence gets shortchanged. Build 15-20 minutes into every route's schedule, not just the ones that feel unpredictable.
Equipment and Documentation Readiness
Have these on hand before you start:
- A tread depth gauge
- A valid checklist or DVIR form, paper or digital
- A flashlight for underbody and wheel-well checks
- The previous day's inspection record
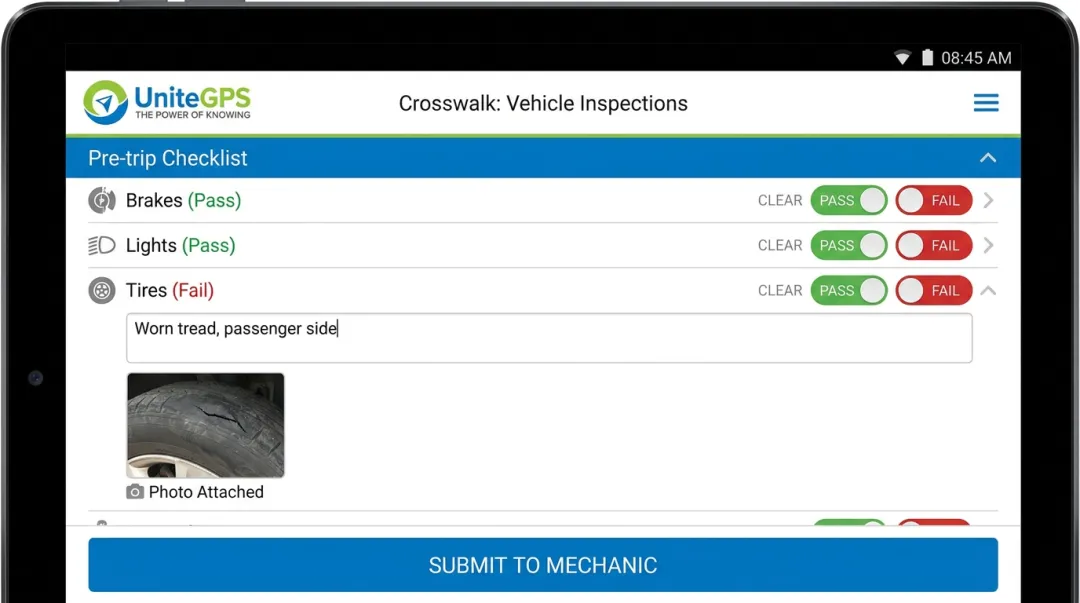
Districts using tablet-based inspection tools, like the Vehicle Inspections feature in UniteGPS's Crosswalk platform, skip the paper step entirely. Drivers complete the checklist on an in-vehicle tablet and attach a photo the moment they spot a cracked mirror or worn tire.
The report then lands directly on a mechanic's screen, a different workflow than digging through a glove box for last Tuesday's form.
Driver and Compliance Readiness
The driver also needs:
- A valid CDL with the proper passenger and school bus endorsements
- A current medical certificate
- Vehicle registration and insurance physically in the bus at all times
None of this is optional paperwork. It's the baseline that makes the rest of the inspection legally meaningful.
Key Inspection Points Most Likely to Cause a Failed Inspection
Some items get missed constantly and cause outsized consequences when they do. Extra attention here prevents both roadside failures and the kind of mid-route breakdown that leaves 40 kids waiting on a bus with hazards flashing.
Brake System Performance
Brake defects are consistently one of the top reasons vehicles get pulled from service. During CVSA's 2025 Brake Safety Week, 15.1% of the 15,175 vehicles inspected were placed out of service for brake-related violations, a figure that reflects commercial vehicles broadly rather than school buses specifically, though the pattern holds regardless of vehicle type.
Impact if missed: Reduced stopping power puts every passenger on that bus at risk and triggers an immediate out-of-service order if caught roadside.
Tire Condition and Tread Depth
Federal rule sets clear minimums: at least 4/32 inch tread depth on front wheels and 2/32 inch on all other tires. Recapped, regrooved, or retreaded tires are prohibited entirely on the front axle, with no exceptions and no gray area.
Impact if missed: Thin tread increases stopping distance and blowout risk, especially in wet or icy conditions common on early-morning routes.
Stop Arm, Crossing Gate, and Student Lighting
These systems exist for one reason: protecting kids crossing the road in front of and beside the bus. A stop arm that hesitates or a lamp that's burned out removes the one visual signal oncoming traffic relies on.
Impact if missed: A non-functioning stop arm is both a direct safety hazard and one of the fastest ways to draw a citation during a roadside check.
Emergency Exits and Equipment
Federal rule under 49 CFR 396.3 requires pushout windows, emergency doors, marking lights, and onboard equipment like fire extinguishers to be formally inspected at least every 90 days. That scheduled check doesn't replace the daily function test; drivers still confirm these open freely and check equipment charge levels every single morning.
Impact if missed: In an actual emergency, a jammed exit or an uncharged fire extinguisher turns a manageable situation into something much worse.
What to Do When You Find a Defect During Inspection
Finding a problem means the process is working exactly as designed: catching a worn brake pad in a parking lot instead of on a hill with kids on board.
The correct sequence:
- Document it. Write a specific description and severity rating on the DVIR, not "brakes off," but exactly what you observed.
- Determine if it's safety-critical. If it affects braking, steering, tires, or emergency exits, ground the bus immediately.
- Get certified sign-off. A mechanic or supervisor must review and certify the repair (or confirm that repair wasn't necessary) before the bus returns to service.
That handoff between driver and mechanic is where paper-based districts often lose time. A form sits on a desk, a mechanic doesn't see it until midday, and a bus that could've been cleared by 7 a.m. sits idle until after lunch.
Digital tools close that gap by routing the report straight to a mechanic's device the moment it's submitted, with a photo attached if there's something visual to show.
The communication side matters just as much. When a defect grounds a bus mid-route, parents start calling the transportation office wanting to know why the bus is 20 minutes late.
Districts using live GPS tracking can update arrival estimates automatically instead of fielding that call volume manually. Tim Lyons, Director of Transportation at Benton Community School District, explains:
"If a parent calls saying that the bus didn't stop, we can look and see that they were there. It has made a huge difference in our district."
The same visibility that settles a dispute about a missed stop also cuts down on confusion when a bus is delayed for a legitimate mechanical reason.
Common Mistakes to Avoid During Pre-Trip Inspections
Most inspection failures trace back to the same handful of habits.
- Rushing the sequence. This is the single biggest reason inspectors miss a brake pressure drop-off or a dead stop-arm lamp. A 20-minute inspection completed in 8 minutes leaves steps unchecked and defects undetected.
- Skipping the DVIR review. Not checking whether yesterday's defect was actually repaired means a driver might unknowingly operate a bus with an unresolved safety issue. Digital DVIR logs that carry open defects forward until they're cleared remove this blind spot entirely.
- Ignoring "small" issues. A loose mirror bracket or a flickering marker light seems minor until it accumulates into a major repair, or a roadside failure at the worst possible moment.
None of these mistakes are complicated to fix. They just require budgeting the time each inspection actually needs, then following the checklist through to the last item.
Frequently Asked Questions
How long should a school bus pre-trip inspection take?
Most transportation departments budget 15-20 minutes per route. Inspectors care more about whether every zone was actually checked than how fast the driver moved through it.
Is a pre-trip inspection legally required for school bus drivers?
Yes, per 49 CFR 396.13, drivers must confirm the vehicle is safe and review the last inspection report before operating it. Most states mirror this requirement in their own pupil-transportation rules.
What is the difference between a daily pre-trip inspection and an annual DOT inspection?
The daily DVIR confirms the bus is safe to operate that day. The annual inspection under 49 CFR 396.17 is a certified check performed once every 12 months, with emergency exits inspected separately every 90 days.
What should a driver do if a defect is found during a pre-trip inspection?
Document the specific defect and its severity on the DVIR. Ground the bus immediately if it's safety-critical, and don't return it to service until a mechanic certifies the repair.
What are the most common reasons a school bus fails pre-trip inspection?
Brake defects, worn tire tread, and non-functioning lights or stop arms account for the majority of failures. All three are catchable with a careful, unrushed walkaround.
Can digital tools replace paper pre-trip inspection checklists?
Yes, as long as the software captures the same required information as paper forms. Digital DVIRs speed up the handoff between driver and mechanic and make records far easier to audit later.